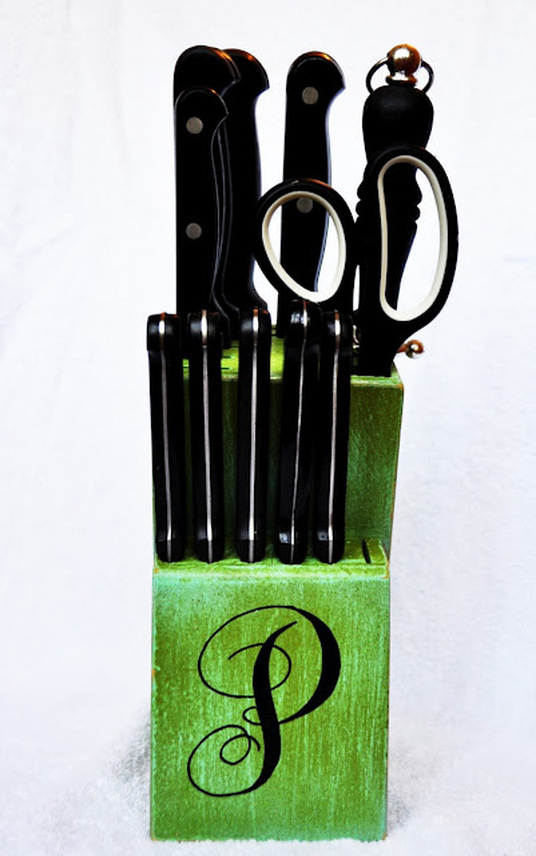
The New.
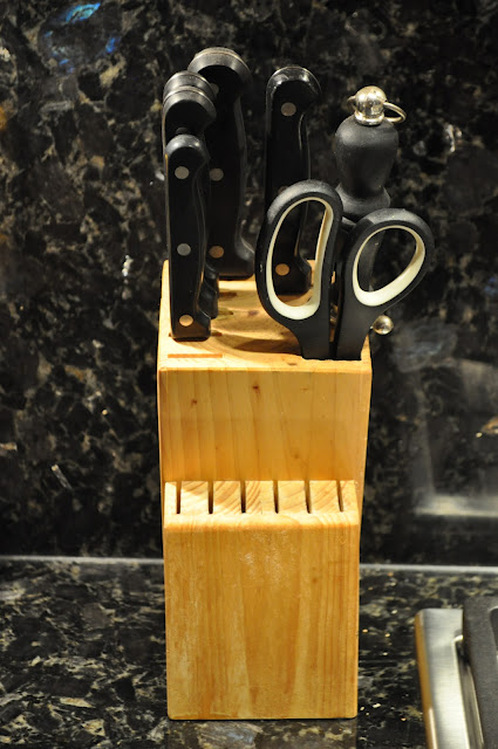
The Old. Yuck. Boring. Blah.
Isn't it amazing what a little paint and some sanding can do?!

Thank you, Silhouette, for cutting out the "P" - You are the BEST!


|
The New. The Old. Yuck. Boring. Blah. Isn't it amazing what a little paint and some sanding can do?! Thank you, Silhouette, for cutting out the "P" - You are the BEST!
0 Comments
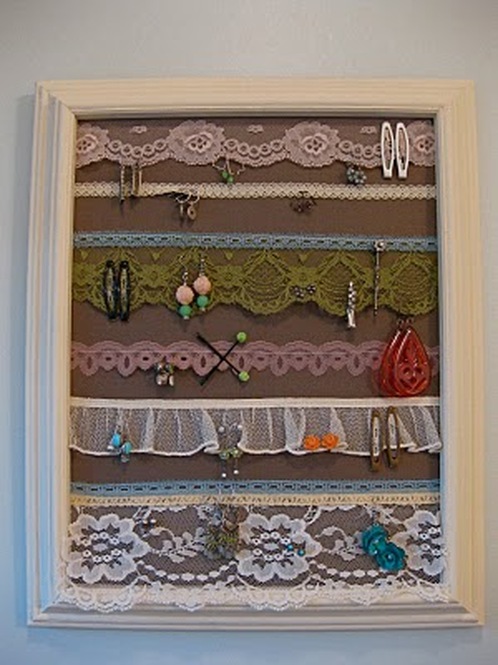 Here is a great user friendly way to store your earrings and have them be accessible from all angles! I really liked some of the ideas that I have seen on other blogs with embroidery hoops, frames with chicken wire etc..., but I wanted something that I didn't have to take off the wall or lift up in order to get my earrings off. The solution? Lace! 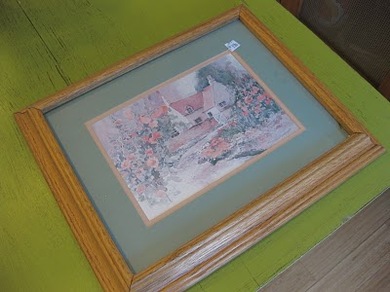 I went to my local thrift store and found this framed water color. I immediately tossed the water color and it's mat in the garbage but kept the cardboard backing. I then painted my frame. The paint color I had was Queen Anne's Lace! It's all so serendipitous! 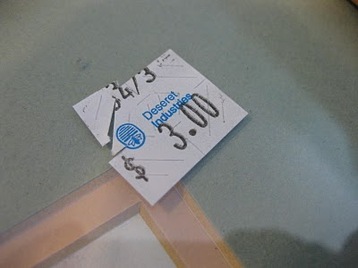 I paid $3 for the frame which is still, in my opinion, a bit pricey for a thrifted frame. But, I figured that since I had all the other materials I needed on hand, that this would be my one and only expense for this project. I can handle that. 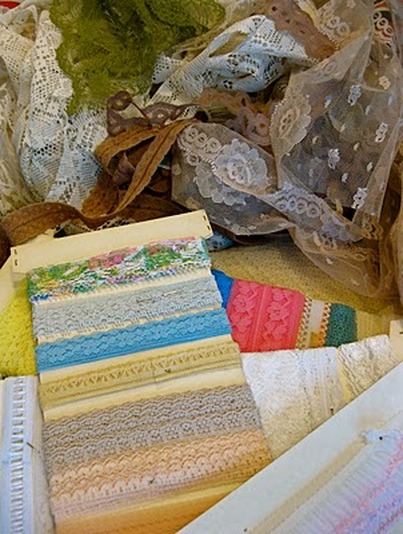 I dumped all my lace out on the table and rummaged through it. I wanted to see all my options and play with the colors, widths and textures. 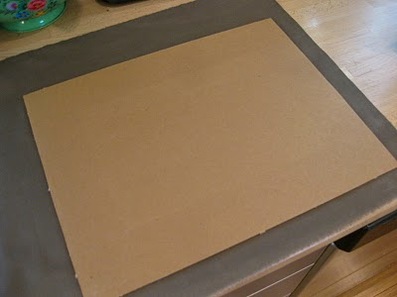 I started by taking the cardboard backing and measuring a piece of fabric by it. I allowed for a 1" fold on each side and trimmed it accordingly. 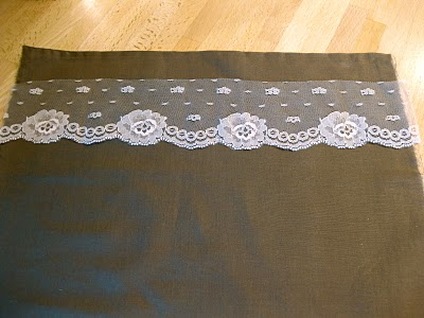 Then, I began to place my lace on the fabric. I pinned it and measured it so that I knew it was straight. I trimmed it to the length of the fabric and I then sewed each piece on. 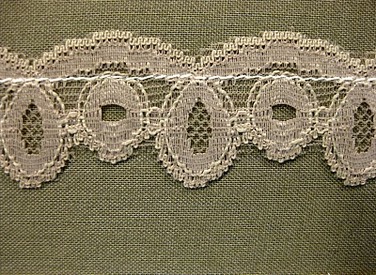 I sewed along only the top of the lace so that it could be flipped up to attach and remove earrings easily. 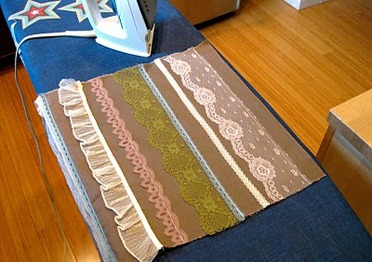 After my lace was all sewn on, I pressed it using a cool setting as to not burn the lace. This removed all puckering and helped my lace lay nice and flat. 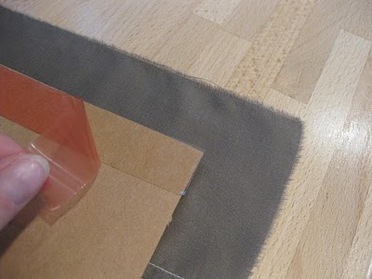 Next, I laid my cardboard down on the back of the fabric and used double stick tape (you can use hot glue or craft glue) and began folding my edges over. Hint: Fold one side over and then do the direct opposite side (i.e. top then bottom). This will ensure a better and more snug fit than if you just went around the frame in order. 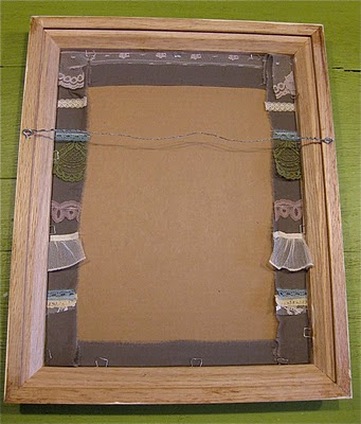 After all my sides were folder over, I set it into the frame and used the wire that was already provided by the previous owner. 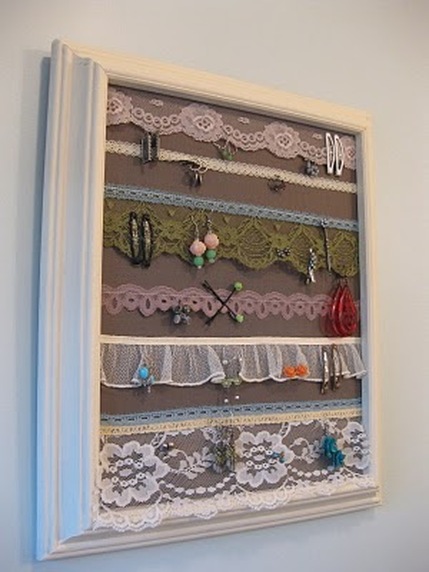 Then I was ready to adorn it with my earrings and favorite hair clips and hang it either on the wall or back of my door! 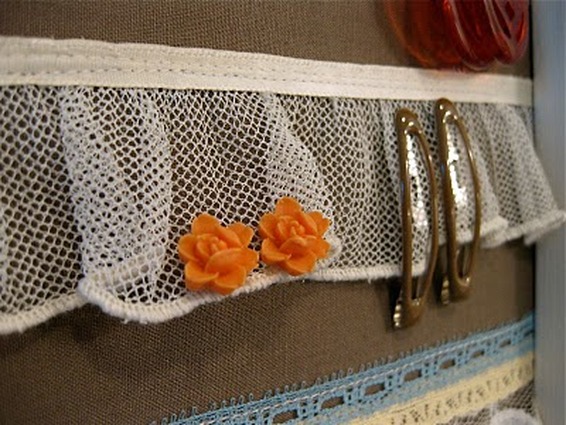 The lace is perfect for both earrings with posts and lever back earrings. 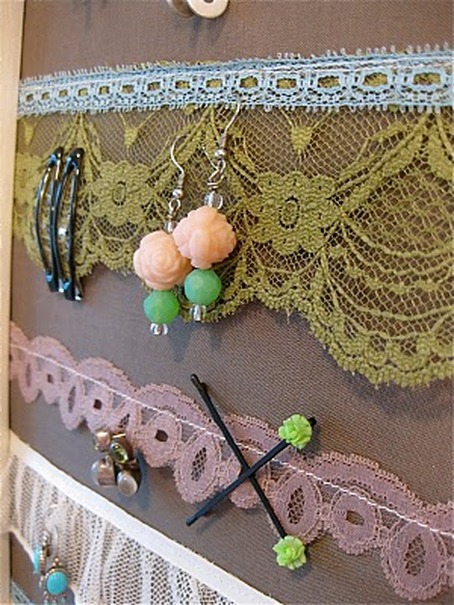 Hair clips go on and off in a breeze, too! Ta-Da! It took me only an hour to do and for $3, who can complain? Not this lady!  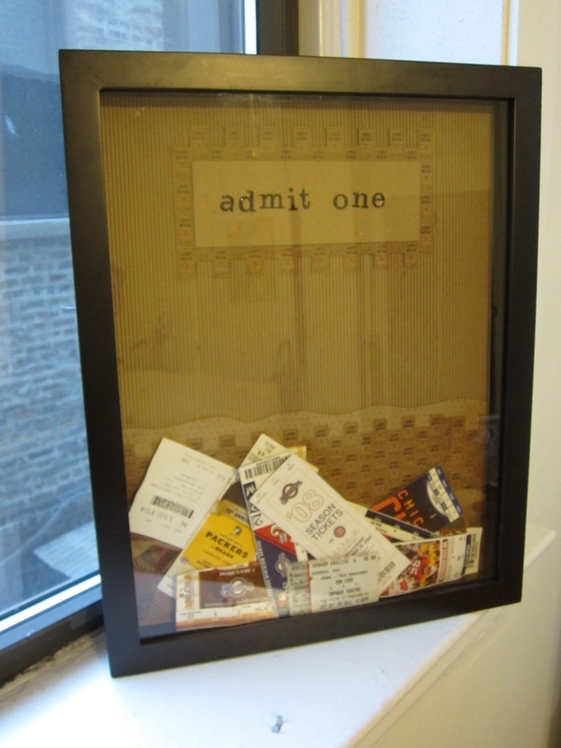 Make this for all your concert, baseball & football tickets... rather than throw away, this is a great way to display! slit at the top of a shadow box to drop in more tickets as the years go on! You can also take apart the shadow box to decorate the back, like shown. Love this idea! Would be so much fun to look back on after so many years to see what you did.  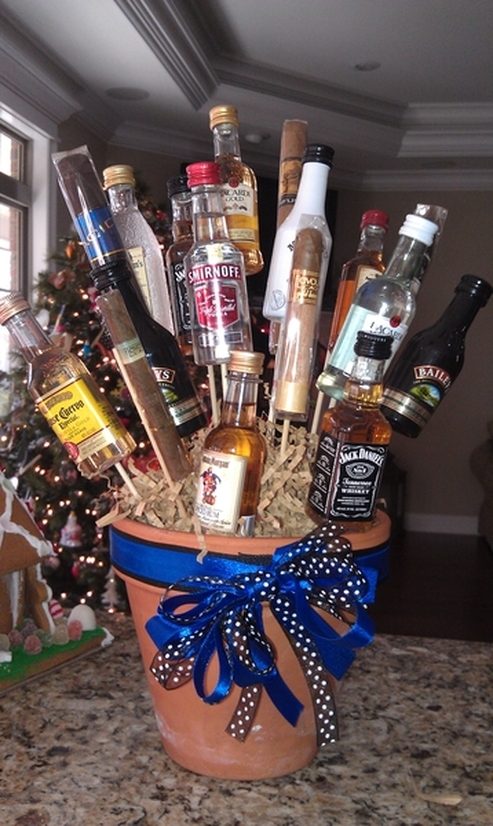 Men don't care for flowers so....make a bouquet of cigars and liquor!  Last Christmas I almost had a breakdown... We had just moved in to our home the month before, but I didn't want to let that prevent us from having the holliest jolliest Christmas. My intentions were good. I wanted to make Christmas special for everyone, but I learned the hard way that I should have been planning ahead!! And that's how it happened. I created a monster. I have been thinking about Christmas since April. Gift ideas are always swirling in my head. (And I'm almost done with this year's Christmas cards!) Well, with this project I created an anniversary gift AND a Christmas gift. But don't tell.... these gifts were cheap. Like really cheap. 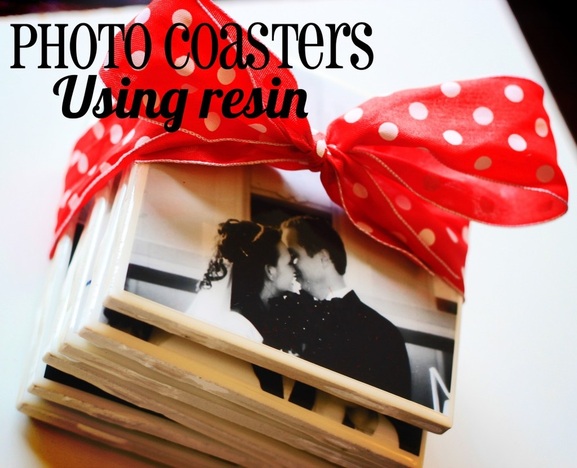 While I was in Utah, my sweet cousin Michelle showed me a couple of projects using resin. She even sent me home with some resin to try out on my own! So I quickly put it to the test. And let me just tell you--I am in love! I can see more resin in my creative future! 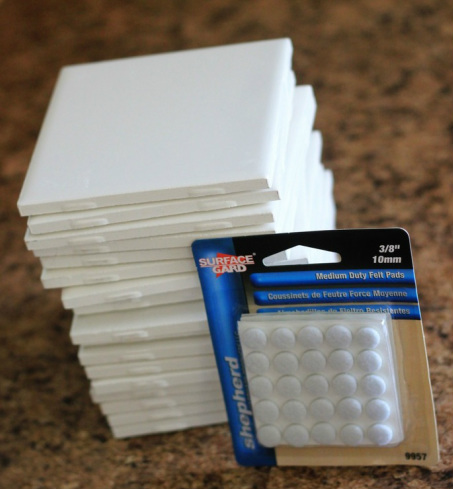 I started out with a trip to Home Depot. These 4x4 tiles were only 19 cents each! It doesn't get much cheaper than that! And I bought a package of 72 felt mounting circles for about $3.50. Not too shabby! 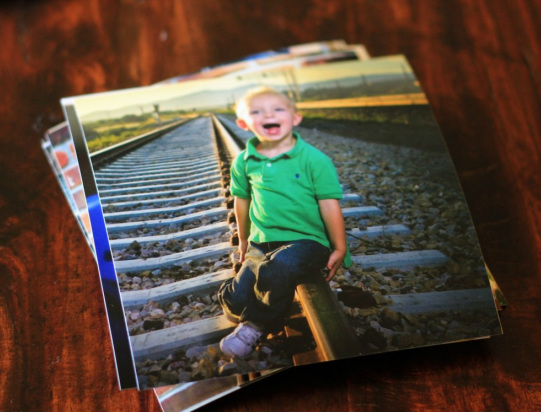 Next, I ordered some photos. Only 13 cents a print at Costco! I cut the prints down to 4x4 so they would each fit on a tile. 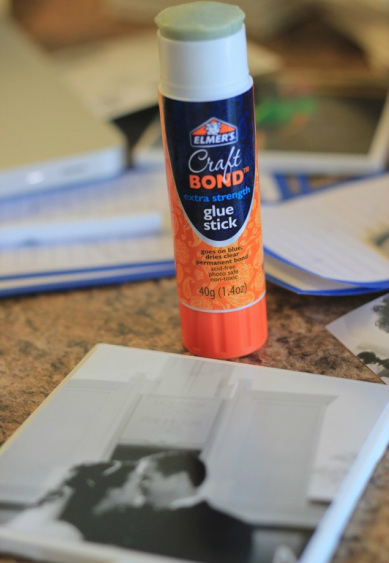 I used a regular old Elmer's glue stick to paste each picture onto the tiles. (I love glue sticks--you can't leave fingerprints with glue sticks!!) 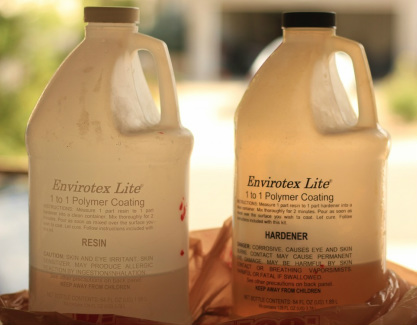 I won't give a full tutorial on using resin because each product is a little different. I used Envirotex Lite, and I followed the instructions on their website very precisely. I have heard that the key to using resin is precision. So I was careful to follow everything to a T! And it worked beautifully! I recommend buying this at Hobby Lobby, where you can use a 40% off coupon. Just a little bit of this will last forever!! Split the cost with a friend, and you'll be set with resin projects for a long time! 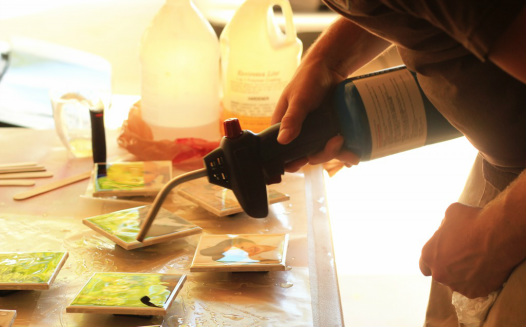 After mixing the resin with the hardener, I just poured it on! I spread it out using popsicile sticks. My hubby helped me use a blow torch (on low) to get out the bubbles that pop up in the first 15 minutes or so. (I've received a lot of comments asking if you have to use a blow torch. The answer is NO! You can simply blow through a straw, blowing out the bubbles in the very same way. My husband preferred to look like a hotshot with a blow torch!) Then it took them a full 24 hours to harden up! In fact, it took 72 hours to get completely hard. 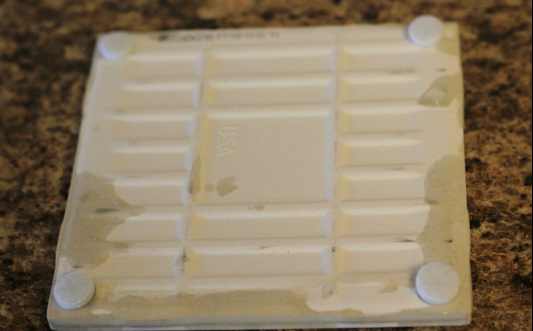 Once dry, I mounted 4 of the felt circles on the bottom of each tile so they would slide easily on wood without scratching! 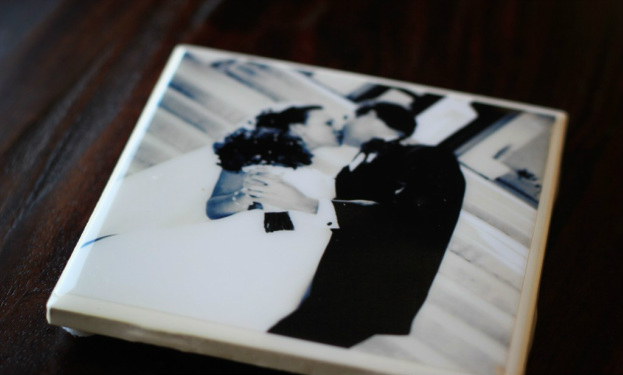 All done! I have to tell you how much I love the hard, smooth glossiness of resin! It's incredible--almost glasslike! 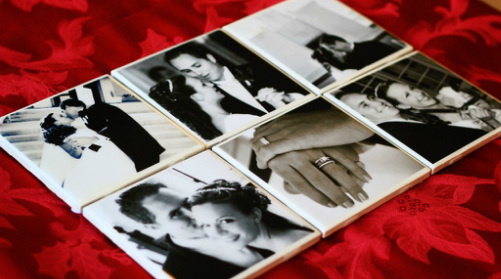 I made a set of 6 coasters as an anniversary gift for my hubby. I used black and white wedding photos. I can't look at my wedding photos too much! Love them! So hopefully when Mr. Oopsey Daisy is drinking his Cokes, he'll appreciate the coaster underneath!  Now these are stinkin' cute!! I made another set of coasters using photos of the sweet grandchildren. These will make the perfect gift for my parents for Christmas. I wouldn't be surprised if my Mom puts these up on an easel instead of using them as drink coasters! 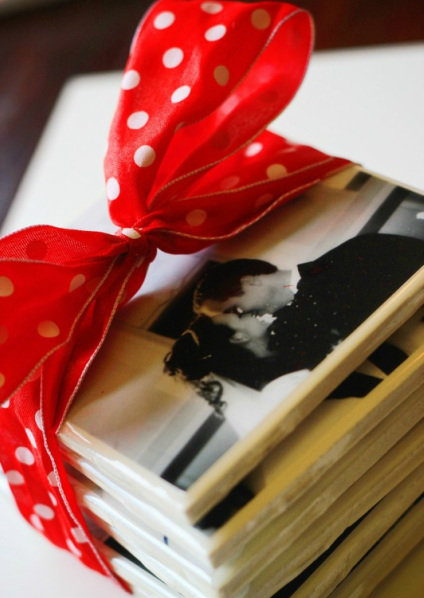 Tie them up with a bow, and you have the perfect gift! 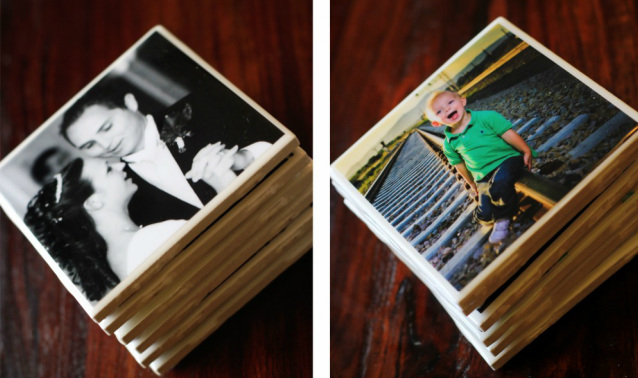 Two sets of coasters (and enough supplies for a third!)--for only $6.50 total. That's about $2.19 per set! My hubby is so proud of my frugality! And I'm proud of my gift planning! Tutorial from: Alison - Oopsey Daisy Blog  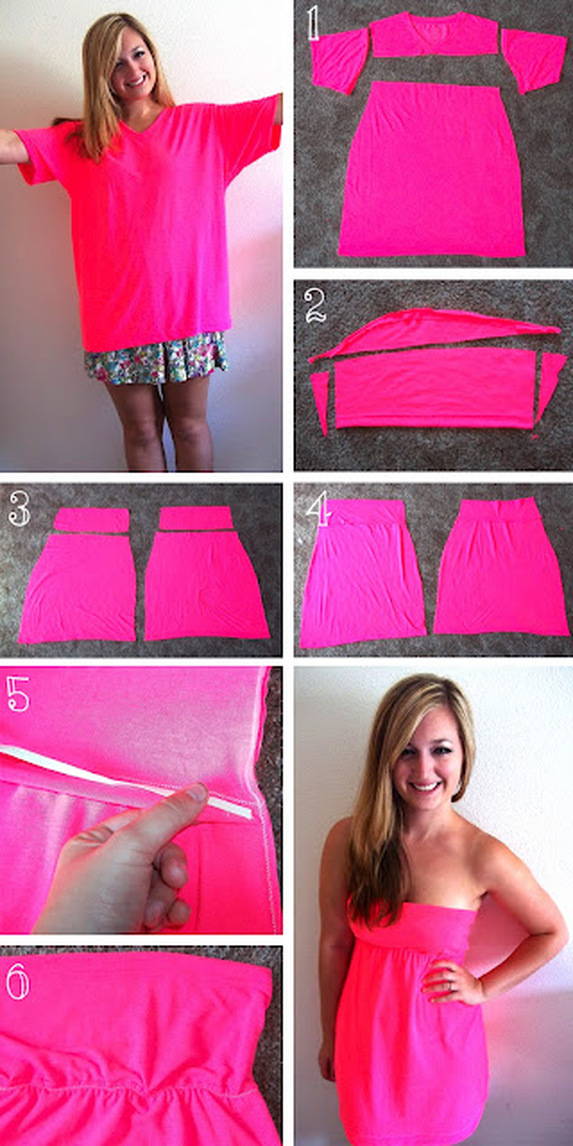 1. You will need a very large t-shirt. Cut off the sleeves, and then cut a straight line right below the neckline. The sleeves will become the top of the dress, and the large chunk will become the body of the dress. 2. Take the two sleeves you cut off, and cut the side seam of the sleeve open on each of them, and lay them flat. This will give you a nice long strip of fabric. (This will be the top of the dress, so test the rectangle pieces against your bust for coverage. As in-measure from your bra band to however high you want to cover your bust.) Cut out 2 identical rectangle pieces. Don't cut off the finished sleeve hem- later you can use this as the top hem on the dress. 3. Match up the top (previous sleeve) portions with the matching body (large chunk) portions. 4. Sew (right sides together) the top pieces to each body piece. Then sew up the side seams entirely. 5. Sew elastic for the waist/under bust. Sew it it straight onto the dress, stretching the elastic as you sew. (If you hate working with elastic, you could also belt the dress here while wearing it instead.) 6. Trim access and turn dress right side out. My shirt was stretchy enough not to need top hem elastic, but if you need it, just feed it through the top hem.  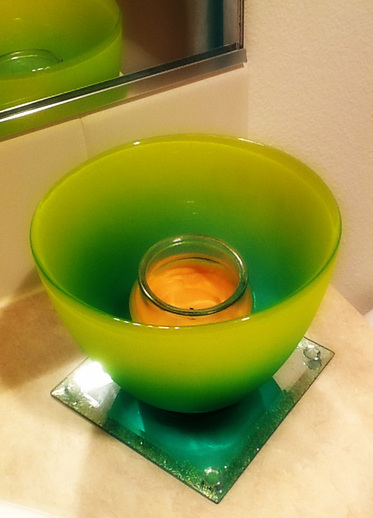 Okay, so I don't have a step by step photo sequence for this craft, but only because I did it at a friends and totally forgot to document! But here it is! I made three candle holders for my guest bathroom out of three old light fixture sconces and three flat candle mirrors... and some glitter and glam :) I took the sconces, hot glued the area where the light bulbs would screw into and then stuck them on to the little mirrors... Turned out pretty cool! The colors in the bath room are turquoise and lime green so these fit right in!  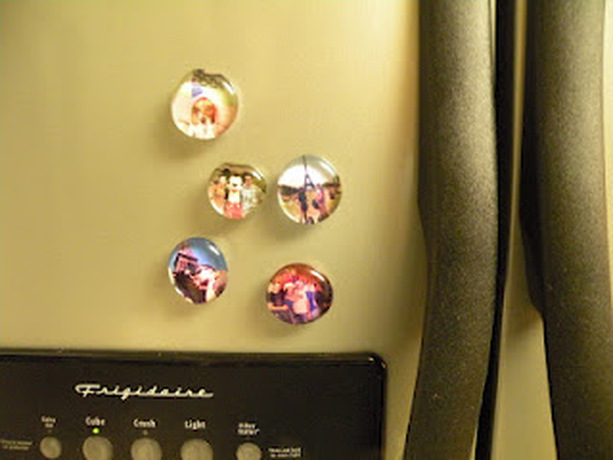 So, I love love LOVE to take pictures. I started making these to display some of my favs on our fridge. When I love something, I like nothing more but to share it---so now I make these as gifts too. Here’s how I made these cheap and easy photo magnets. What you’ll need:
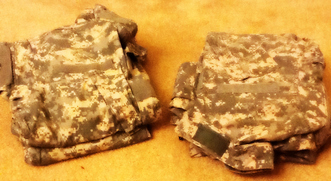
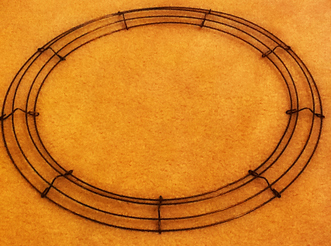
Preparing the Photos You might be wondering how I have these pictures so small. When I initially started making these a few years ago, I would PhotoShop each one individually and had to print them out several times to assure appropriate sizes. Then I remembered that CVS Pharmacy has this awesome mini-collage option that I use all the time for my class. Basically you can print 9 pictures onto one 4X6 photo. There you go, perfect size for the jumbo sized gems for about 29¢. Unfortunately, I’ve found that I can only order them at the store’s kiosk and not online but no biggie. When you go to the Kodak kiosk, select the Collages option and then select the Mini-Collages. Make sure the object/person in the photo is in the middle, you will be cutting a circle out of the itty bitty rectangles. So now that you have your pictures printed here’s what I did: First, fish through the gems and pick ones that do not have any cracks or that are starred. I know some have an iridescent look but those are kind of hard to see through so I don’t like using those. Next, place the gem on top of your picture and trace the gem as close as possible using your pencil. Carefully cut around your markings, I made sure to cut inside my line so it wouldn’t hang off. Then, you will want to place the glue directly onto the back of the gem, I have used this adhesive that’s especially for glass but I also like the Aleene’s Clear Gel Tacky Glue. When I notice that the glue is getting to thick or old, I’ll put them in a cup of hot water before I use it to soften them up so it’ll be easier to spread and it will minimize the bubbling also. Just a suggestion :-) I spread it with my finger or a toothpick, the key is to make sure to have an even layer so that you have not bubbles…I hate bubbles on these. Carefully place the gem onto the photo. Be sure to PRESS FIRMLY onto the photo…again, so that there will not be any bubbles. I basically was putting all my weight on these little boogers. Some adhesive will run off, just wipe them off. Try to work off as many bubbles by pressing firmly. Now use some Tacky Glue on the back for the magnet, you’ll want to put enough so that it’ll barely spills out from under the magnet. Now you’re done…just make sure to wait til it’s completely dry before you hang it up or else it’ll slip off the magnet. Enjoy these cute magnets and make some for your friends and family…they’ll love the personal thought. 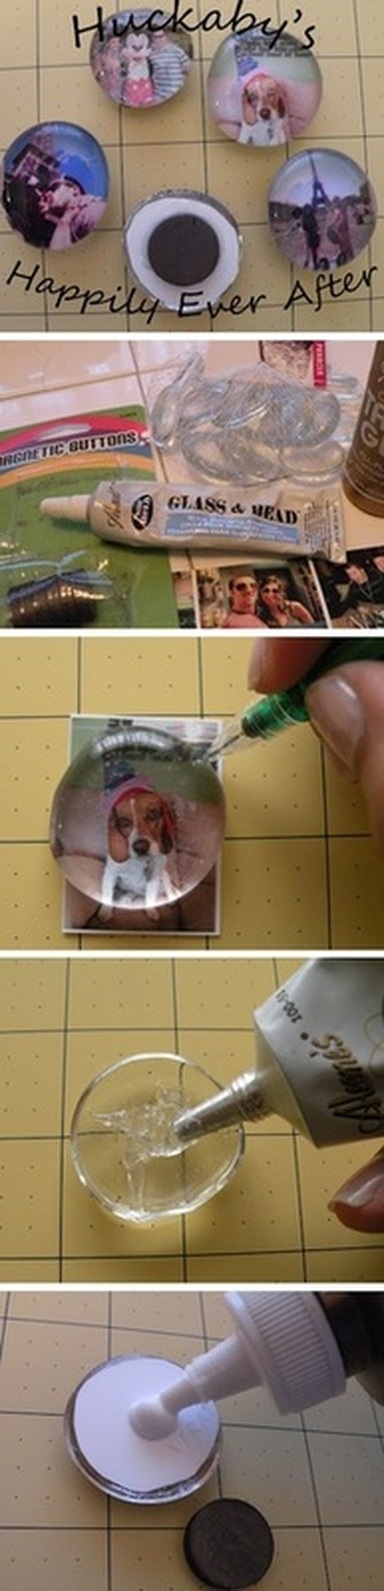  So we all have old ACUs or fatugiues laying around and most of us have no idea what to do about it... Well! I discovered a while ago a way to make a home adornment wreath out of the old ACUs that Matt tossed aside. You will need: Two sets (tops and pants) of ACUs, sewing scissors, ribbon of your choice (length can be determined by you), and a craft wreath.
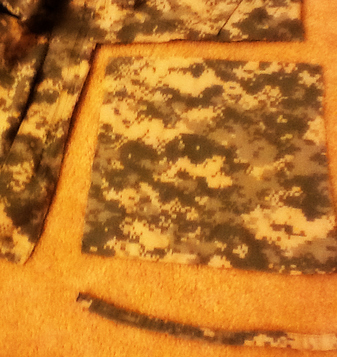 Step One: Cut up the ACUs - You will need sharp sewing scissors for this, esp for flame retardant fabrics. Cut along the major hems and stitching. You should end up with a pile of single layered ACU fabric (as seen below) 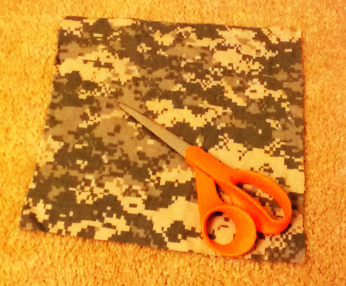 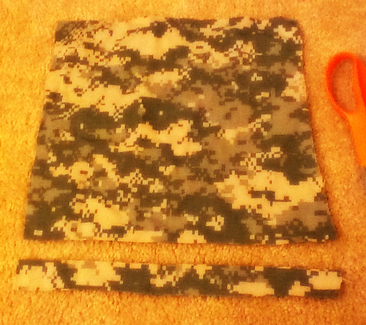 Step Two: Cut each "scrap" into appx six inch by two inch strips 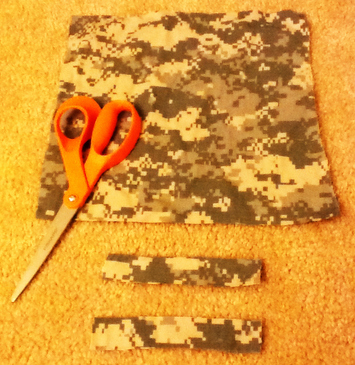 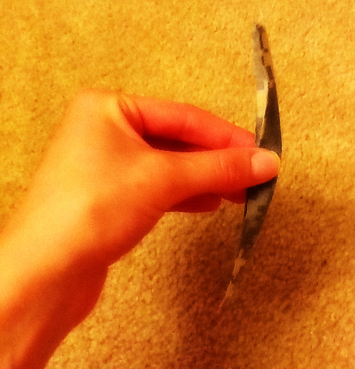 Step Three: Take one of your strips and fold it in half 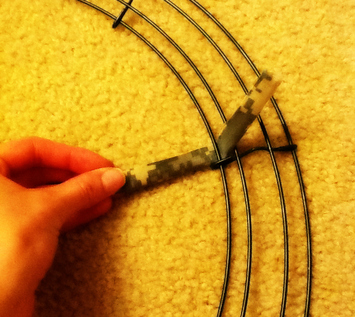 Step Four: Place folded scrap under "rung" of wire wreath 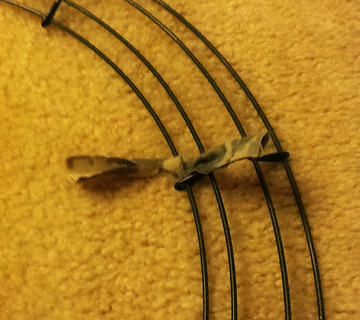 Step Five: Tie the scrap onto the wreath with equal part tails 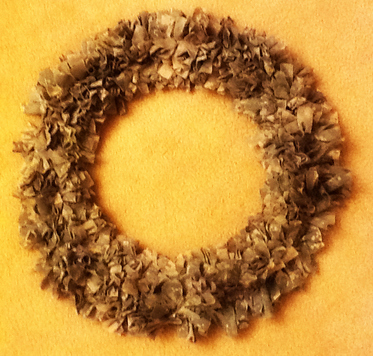 Step Six: Repeat Step Five and squish as many of the ties you can onto one row of the wreath. When one row is full, begin on the next, and so on and so forth. This is what it will look like when it is almost done...  Step Seven: Take your ribbon of choice, and cut desired length for the bow 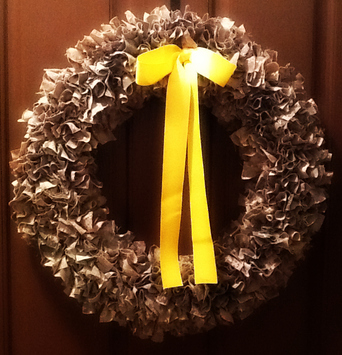 Step Eight: Secure ribbon into bow shape on the finished tie wreath. And hang on door! 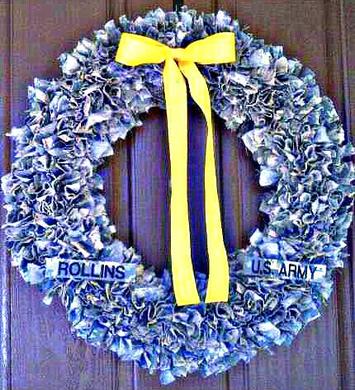 Step Nine (Optional): Take your S/O's name tape and branch tape and glue gun to the wreath in desired fashion to make personal!  |


 RSS Feed