
|
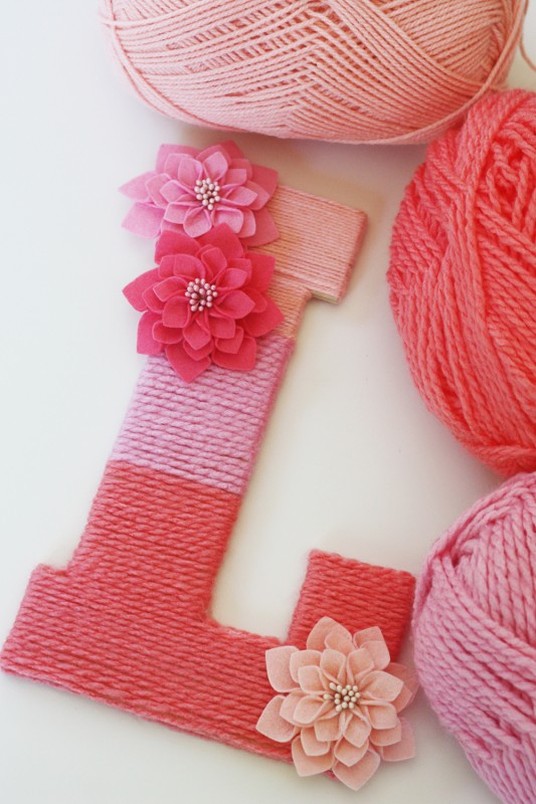 I love ombre. So when I thought about making something easy and pretty to decorate a baby girl's room for a friend of mine due any day now, I knew I wanted pink. I used yarn in 3 different shade of pink to give me my ombre effect, these Martha Stewart embellishments, and a wooden letter "L "(for Lainey) I found at Michael's. 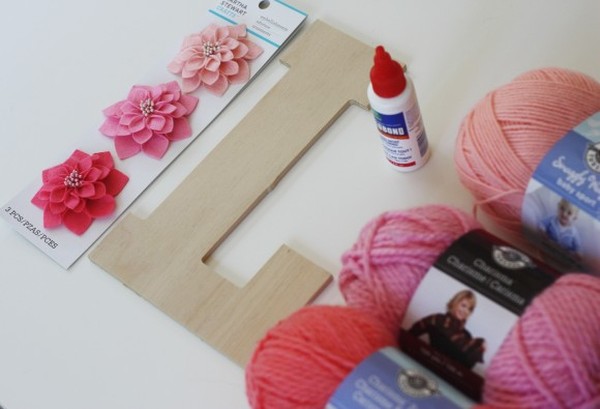 I only applied glue to the backside, the top, and bottom of the letter. I would glue about three inches, then start wrapping, then add more glue as I moved up. I left the ends of the yarn long until the whole thing had dried. Then I trimmed them. 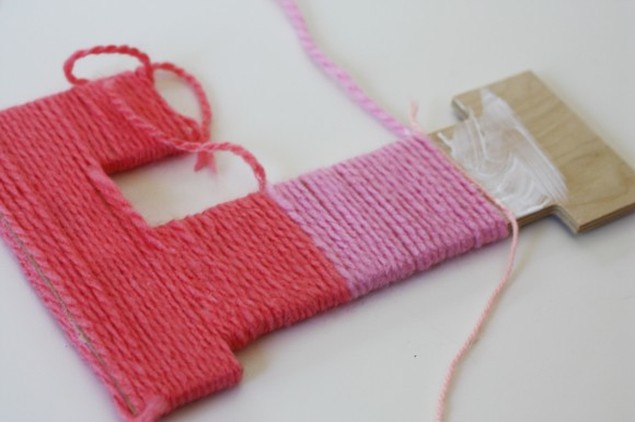 I added my embellishments, which have sticky tape on the back, and I was done! 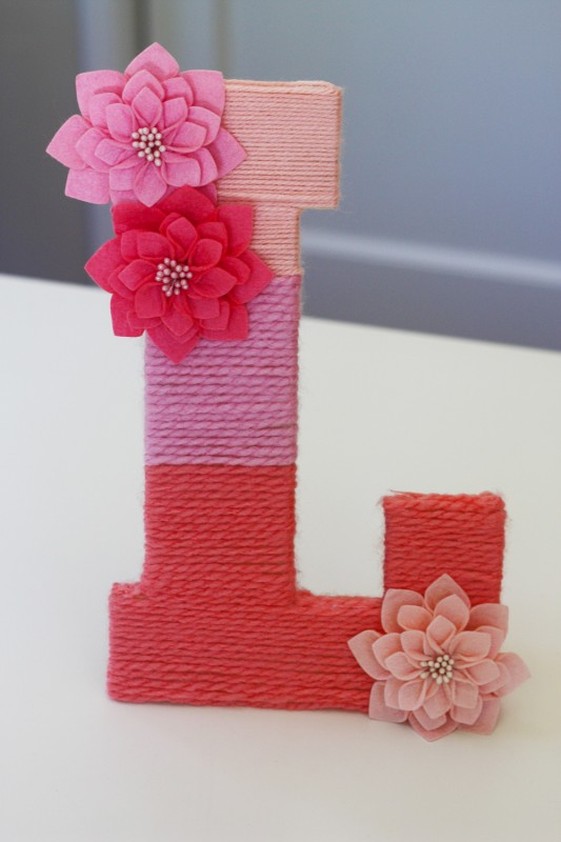 The whole thing probably took about an hour and the longest part was waiting for the glue to dry. I'm going to lean this up against her window on her dresser to add a little warmth and "girly" sweetness to her room. But how great would this look as decoration at a baby shower!  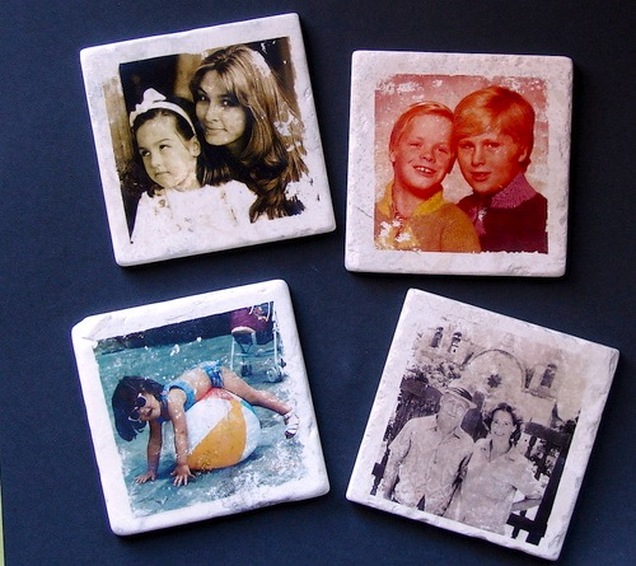 These coasters are a hit and pretty much everyone who receives a set says it's a great gift! You can use images of family members from the past and present which included those still alive and those who had passed. Those brought tears because of the memories the coasters has elicited and because some of the photos they had never seen. It's nice to know that such a simple and practical gift could be meaningful as well. After many, many,(many) mistakes and hours of frustration I finally perfected the technique and I'll share with you how to make the coasters. The materials are relatively inexpensive, but they do take some time to make. Here's what you'll need to begin : 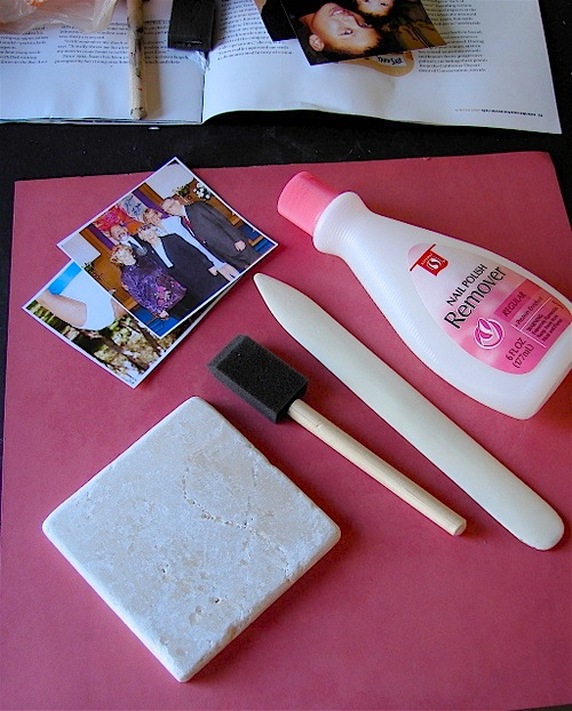 * 4" Tile (uncoated). I picked mine up at Home Depot. The package says "Botticino" by Jeffery Court Inc.,(it might be called Giallo Sienna now) and it's travertine tumbled stone. They come in a pack of nine and I figured for every two or three that come out great, I should have an extra one in case the ink doesn't transfer well, which does happen (you can always sand the image off and try again). Also note that some packs come with one or two tiles that are too porous to use. * Inexpensive fingernail polish remover (contains acetone and works better than straight acetone which we've tried). The generic one I get from Safeway works great..avoid any that say 100% acetone. The ink will transfer but mine came out looking flat and lacking in detail. Use a well ventilated room or better yet outside. The acetone from the nail polish remover is obnoxious as is the tile sealer. A mask helps too! * a Bone folder (that thing in between the brush and polish remover). If you don't have one the back of a spoon, the blunt edge of a butter knife or anything like that works just fine. A bone folder is great if you ever make your own cards and need to create a fold down the middle without the paper getting creased. It has many uses and is worth buying. Michael's and most craft store carry them. You will be using the blunt end of the bone folder for this project. * a foam brush (get 2 or three if you're doing a lot). * colored copies from Kinkos**. I've tried ink jet prints from my computer and it doesn't work. Don't waste your time and money trying it. If you have a laser printer I don't know if it works or not. I'd make at least 3 copies of the same image as you may mess up and the last thing you'll want to do is make another trip to the print shop this time of the year! Also if your image is faint, up the contrast and saturation on the copier. Make sure you push the reverse or mirror image button on the copier. This way you won't have images or words showing up reversed on your coasters. *~ Ink must be toner ink (ink jet or laser printer ink will not work). *~I had a person mention that their local Kinko's just switched to laser color copies, so be sure to ask/call before printing your images. *** Someone asked if you use regular or photo paper and all I can say is if you go to Kinkos use their color copier and use the paper they have in there. I never specify a paper but I think its their photo paper that is light like regular paper but smoother. * a sheet of clear acetate (not pictured). You can pick one up at the print shop while you're making your copies. This is one of those items you really need as it protects the color copy from being rubbed off before the ink has had time to transfer. * Cheap latex gloves. Protects your hands from acetone and tile sealer. Now you can begin~ A. Take two or three coasters and heat them in the microwave for a minute. Heating up coasters helps the ink stick to the tile. (This is one of those tricks we learned after many frustrating attempts). B. After cutting your images down to fit a 4" x 4" tile place image face down on warm tile. 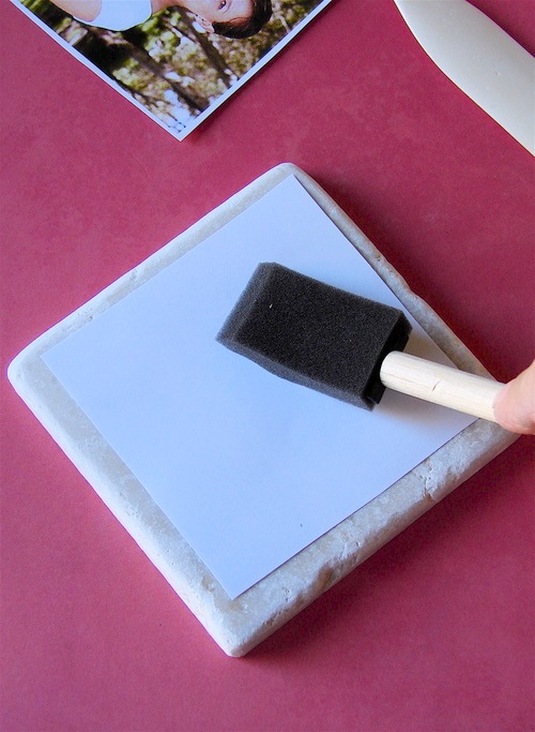 C. Pour some nail polish remover onto the brush and/or the color copy and coat the entire back of the image. Hold image in place while applying the polish remover. D. Put the sheet of acetate over that and take the blunt end of the bone folder or back of a spoon and rub the entire image. This is the hard part as it takes patience and some elbow grease. You will have to take off the acetate and add some more nail polish remover as it evaporates rather quickly. Every so often stop and slowly lift the corners of the color copy to see if the ink is transferring. Don't worry if paper sticks, it can be washed off and rubbed off later. Once your image has transferred you can remove the leftover paper from the color copy and wash it off with water. Use a tile sealer (available at any hardware store) and apply a coat or two to the tile. When it dries you will not even see it and it allows the tiles to be hand or machine washed. The bottom of this tile is pretty smooth but if you want you can add felt stoppers. I bought a sheet of sticky back felt at Michaels (most craft stores carry these now for about a dollar) and used a hole puncher to punch out tiny stoppers for the bottom of the tiles. Works great! And that's it. I made sets of five coasters and wrapped them with a raffia cord or ribbon with a little tag attached. They really do look nice in a set and for all of you artists I know they'd look great with your artwork on there! Also my favorite images are old B&W photos and polaroids from the 60's. Have fun experimenting with all sorts of images.  Enjoy!  I cannot even tell you how excited I was when I found this pin explaining how simple it is to cut glass bottles. For fun my sister signed us up for a glassblowing class. It was awesome and we had a great time. As we were leaving, one of the artists was turning Corona bottles into drinking glasses for a friend’s wedding gift. I was wondering why these glasses weren’t one of the projects we could choose from that day. I left there thinking that Corona glasses could only be made by the glassblowers and their fancy equipment. Apparently I was wrong. 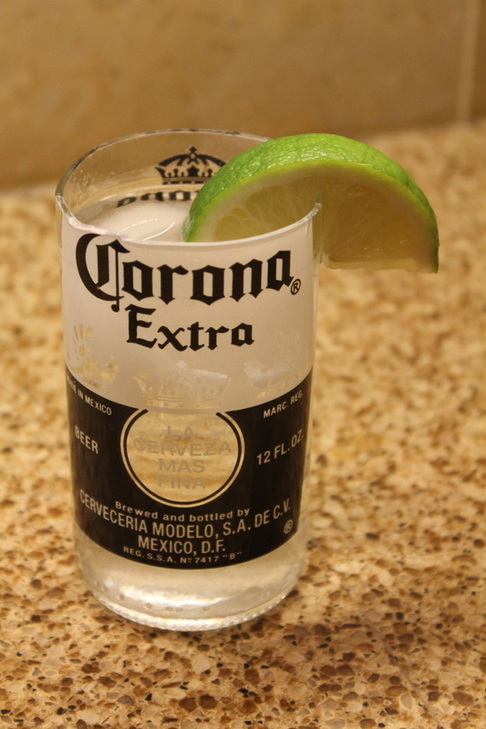 You can cut glass bottles at home using materials you probably already have on hand. Materials: glass bottles yarn nail polish remover lighter sink full of ice water sandpaper Directions: 1. Wrap the cotton yarn around your bottle 5-6 times, tie and cut ends. You can also braid three pieces together and tie that around the bottle. I actually had better results using the braided yarn. 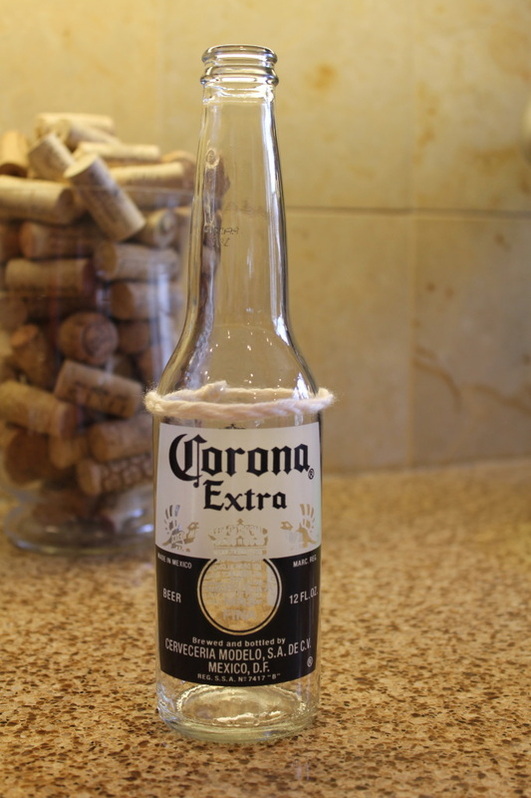 2. Slide yarn off of the bottle. 3. Dip yarn in nail polish remover. I filled a bowl with nail polish remover and let the yarn sit in it for a few seconds to make sure it was fully saturated. 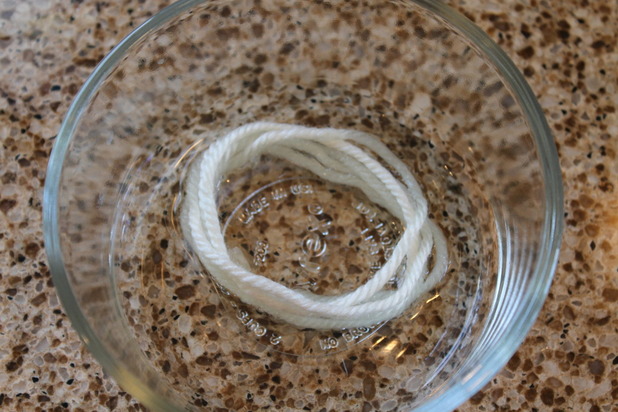 4. Slide the wet yarn back onto the bottle. NOTE: The bottle will be cut wherever you place the yarn, so make sure it is as straight as possible. 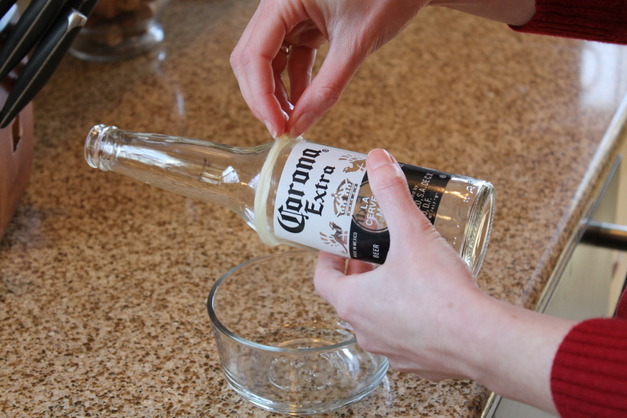 5. Holding the bottle sideways from the mouth, light the yarn on fire. ****Please please be careful!**** Only the wet yarn will be lit on fire and the flame is very well controlled.  6. Rotate the bottle in circles as the yarn is on fire for 20-30 seconds so that all parts of the bottle warm evenly. 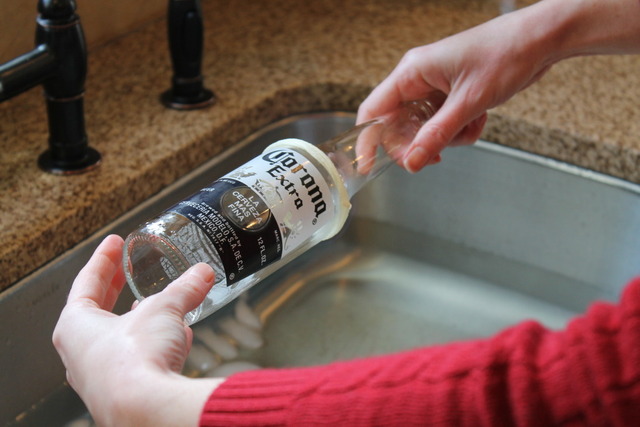 7. Holding each end of the bottle, submerge in cold water and watch the bottle parts separate. 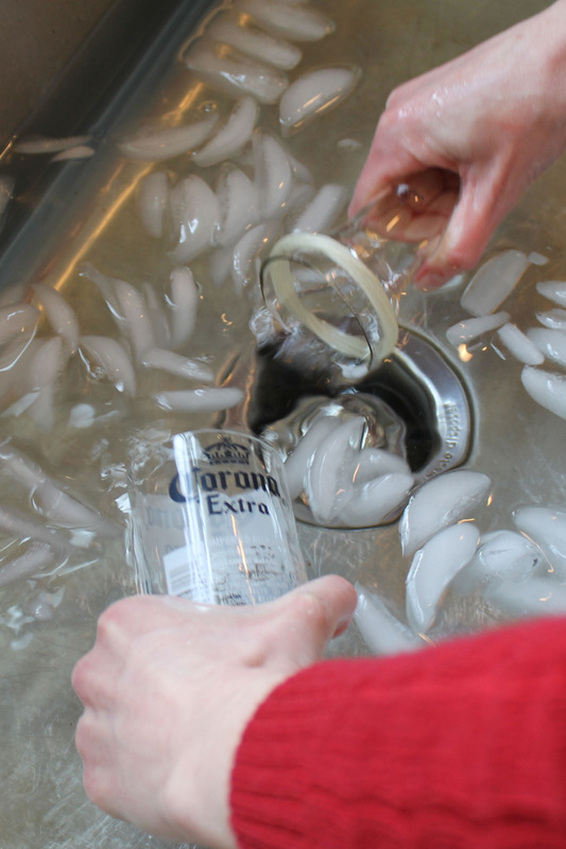 8. Use sand paper to smooth rough edges. The hardest part about this project is getting the cut in the right spot. Because the Corona logo goes up so high, you don’t have much room to work with. The glass on the neck of the bottle is thicker and harder to cut using this method, so it took a few tries for me to get the desired results. It was worth it though! You can make more than just drinking glasses. Think vases and candle holders too! This method is supposed to work on wine bottles too, though I haven’t tried those yet.  |
 RSS Feed